Follow Me On Social Media!

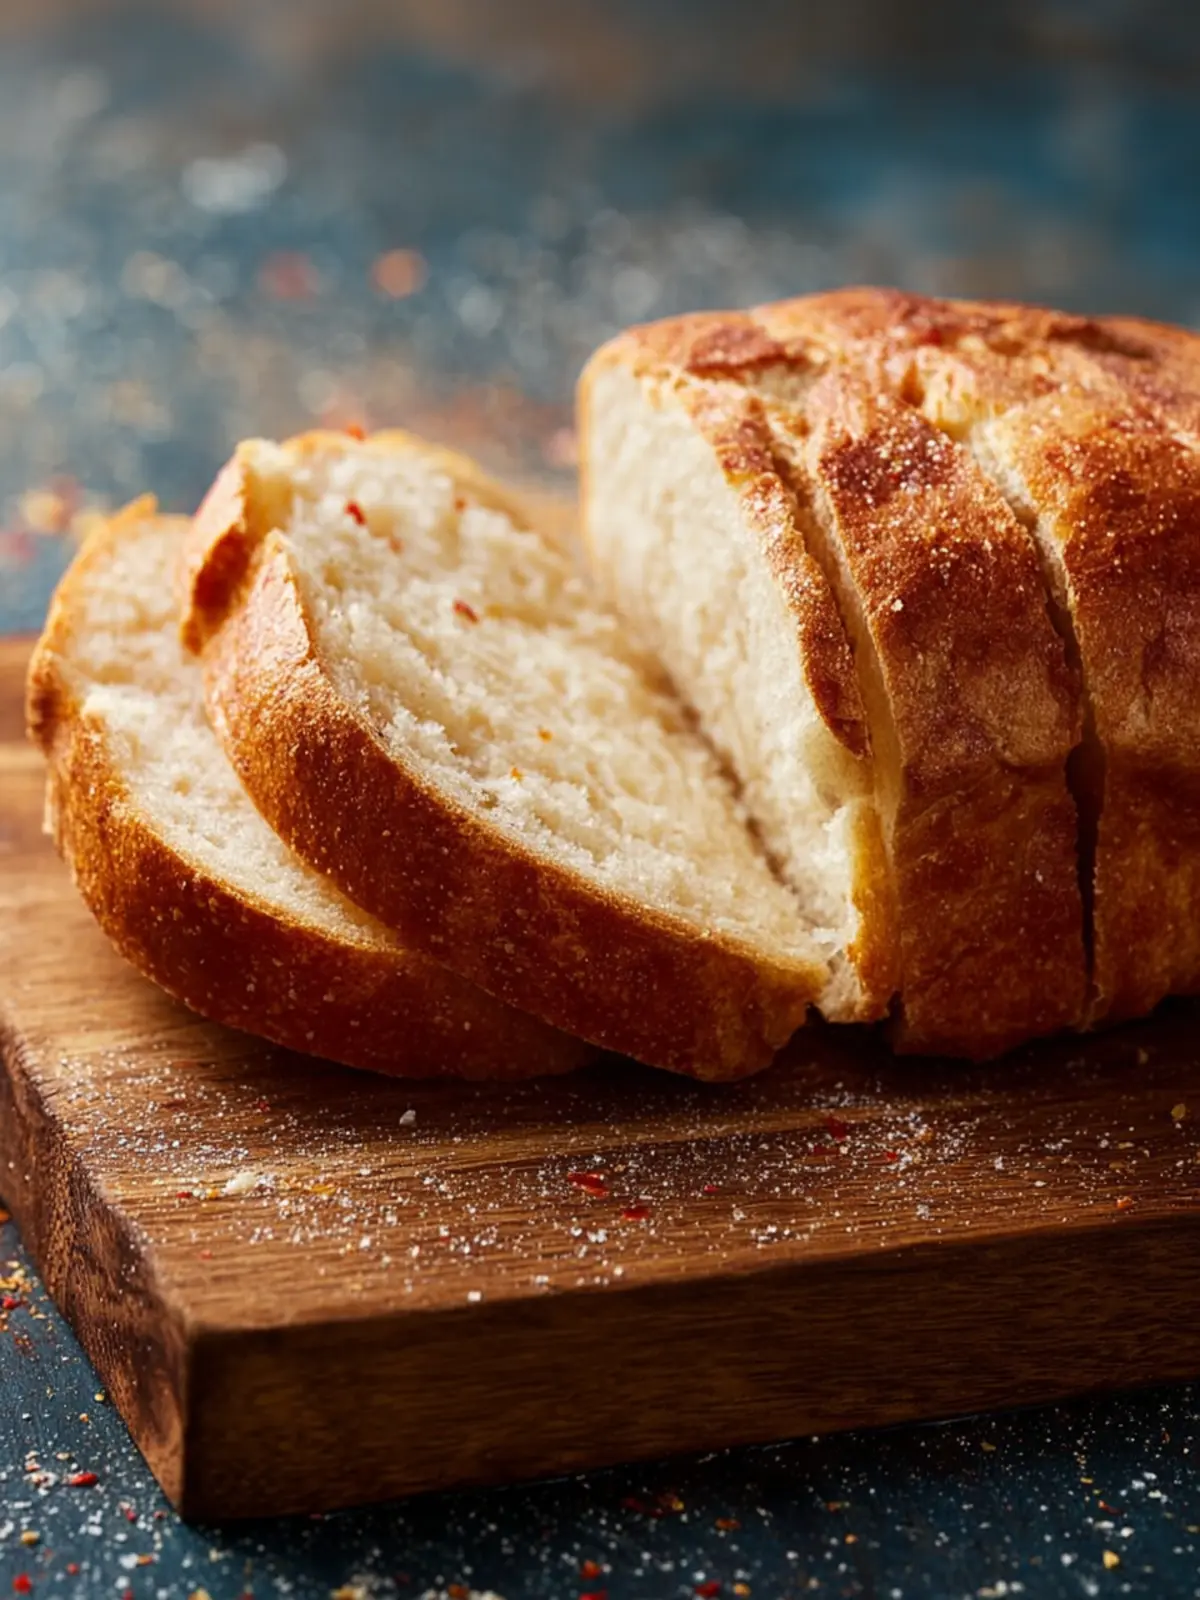
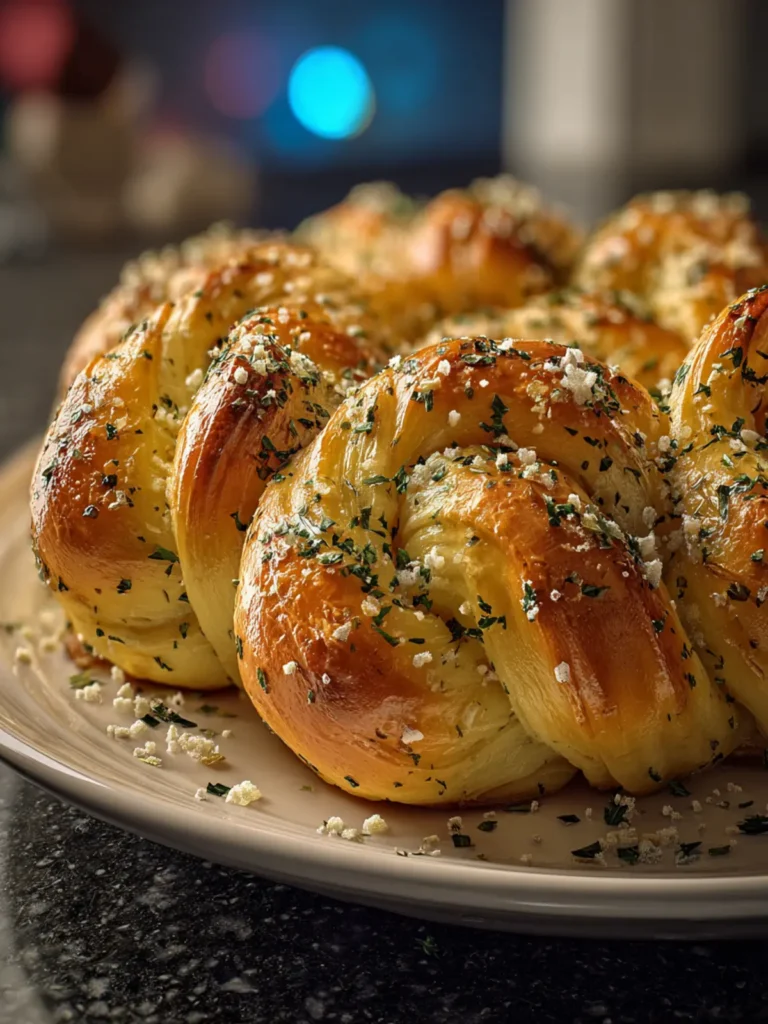
Gluten Free Bread Made Easy: Your New Favorite Recipe!
Introduction to Gluten Free Bread
Embracing the world of gluten free bread can feel like stepping into a vibrant new realm of flavor and texture that’s not only enjoyable but also healthy. Imagine walking into your kitchen, the scent of freshly baked bread wafting through the air, reminding you of home and warmth. For many, gluten-free living arises from necessity, whether due to celiac disease or gluten sensitivity, but it also opens doors to creative culinary adventures.
Why choose gluten-free bread, you might ask? First, it caters to those with specific dietary needs, allowing them to partake in the simple joy of bread without compromising their health. More than that, gluten-free bread can be a delightful option for anyone looking to diversify their diet and discover new flavors. With the right ingredients, you’ll find that gluten-free bread can be just as tasty and satisfying as traditional varieties—if not more so.
Why Choose Gluten-Free Bread?
Choosing gluten free bread isn’t just a matter of necessity; it’s also about exploration and taste. Many gluten-free bread recipes utilize unique ingredients like almond flour, coconut flour, or tapioca starch, which introduce refreshing flavors and textures you might not find in conventional breads.
Benefits of gluten-free bread include:
- Health Advantages: Some people report improved digestion and increased energy when they eliminate gluten from their diet.
- Innovative Ingredients: Whether for flavor or health, gluten-free options often include nutritious ingredients that are rich in fiber, vitamins, and minerals.
- Baking Creativity: The absence of gluten invites creativity in the kitchen, encouraging experimentation with diverse recipes and techniques.
As you dive into the world of gluten free bread, remember that every slice tells a story—your story, filled with the adventure of cooking, baking, and embracing new food experiences. Let’s embark on this journey together and discover the joy of homemade and delicious gluten-free bread!
Key Ingredients for Gluten Free Bread
Creating the perfect gluten free bread is all about selecting the right ingredients that meld together for great flavor and texture. Here’s a breakdown of what you’ll need:
Gluten-Free Flour Blend: For the best loaf, I recommend using a high-quality gluten-free all-purpose flour blend. It typically includes a combination of rice flour, tapioca starch, and potato starch, which work together to create a light and fluffy texture.
Psyllium Husks: This ingredient is a game-changer. Psyllium husks help to bind the ingredients and create that essential elasticity often missing in gluten-free baking.
Yeast: To achieve a soft, airy interior, I prefer using instant yeast. It helps the dough rise beautifully, giving you that delightful bread-like texture.
Liquid: I usually use warm water and a splash of milk or a dairy-free alternative. This adds moisture, which is crucial for a tender crumb.
Sweetener: A bit of honey or sugar not only enhances flavor but also feeds the yeast, promoting a better rise.
Salt: This enhances the overall flavor of the bread and balances the sweetness.
By combining these ingredients thoughtfully, you’re well on your way to crafting a scrumptious gluten free bread that everyone will love.
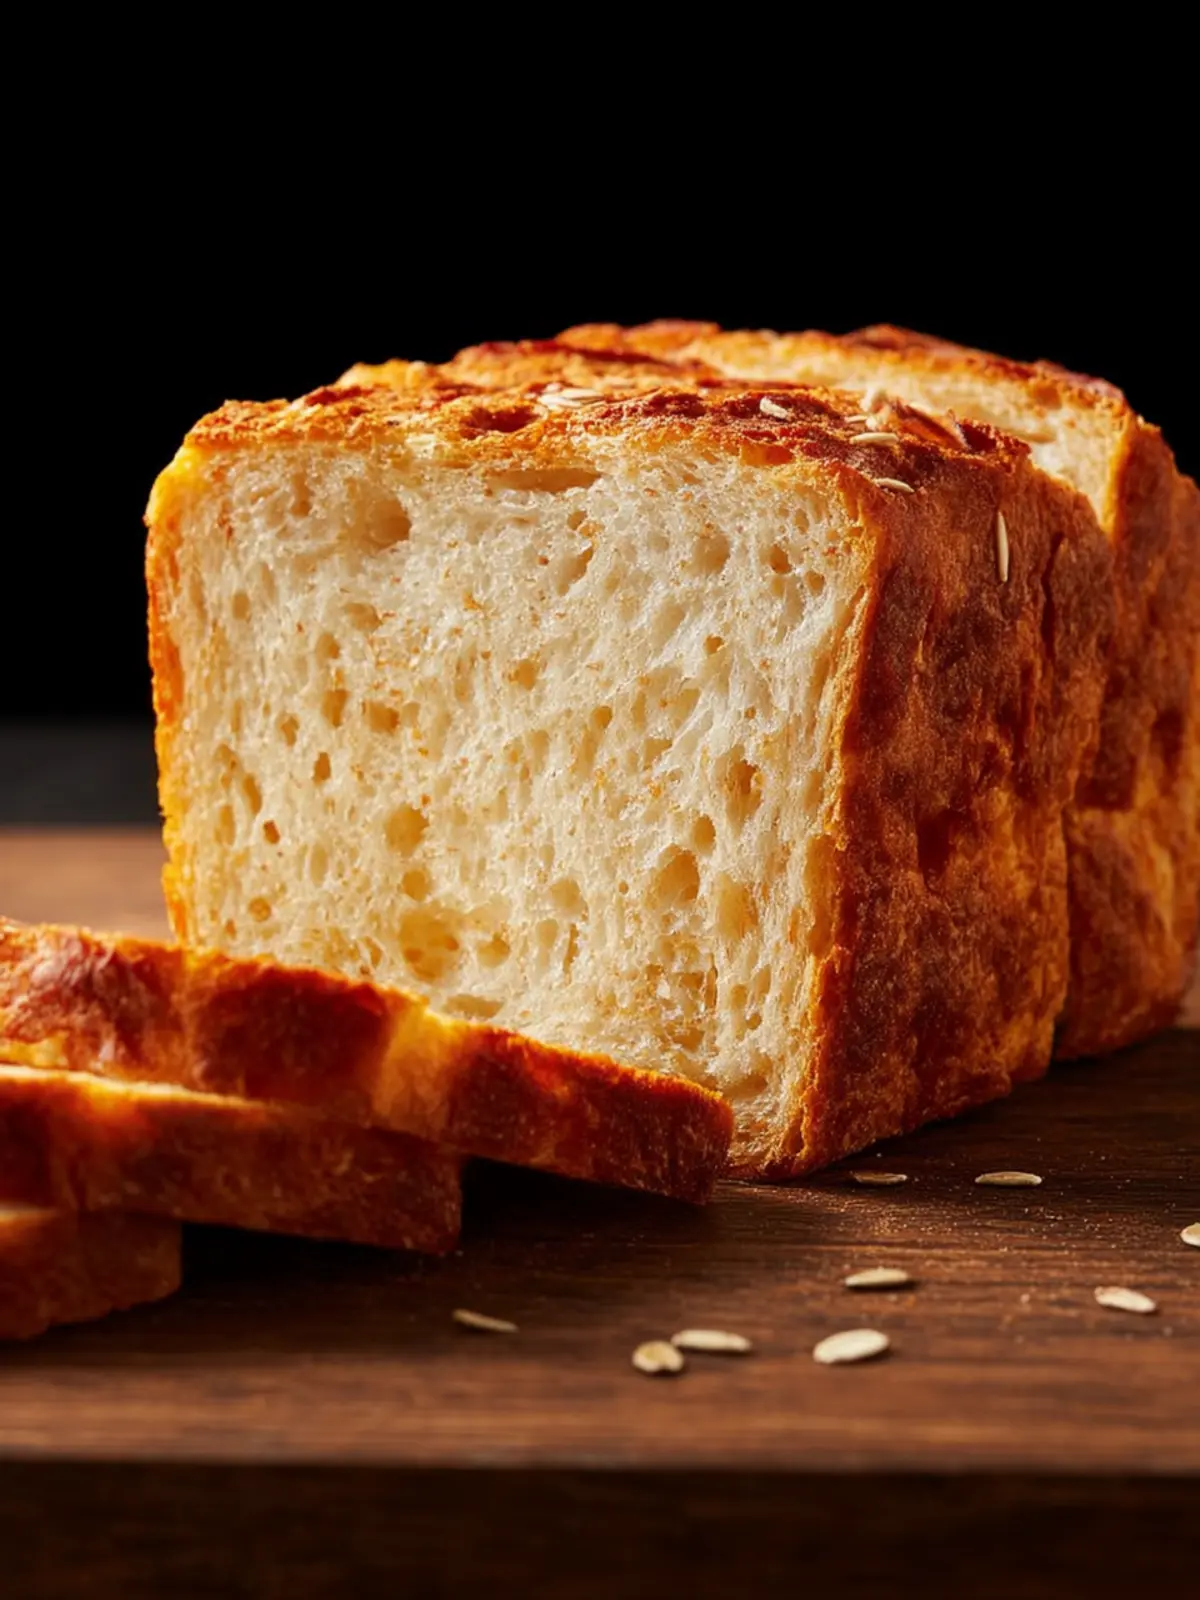
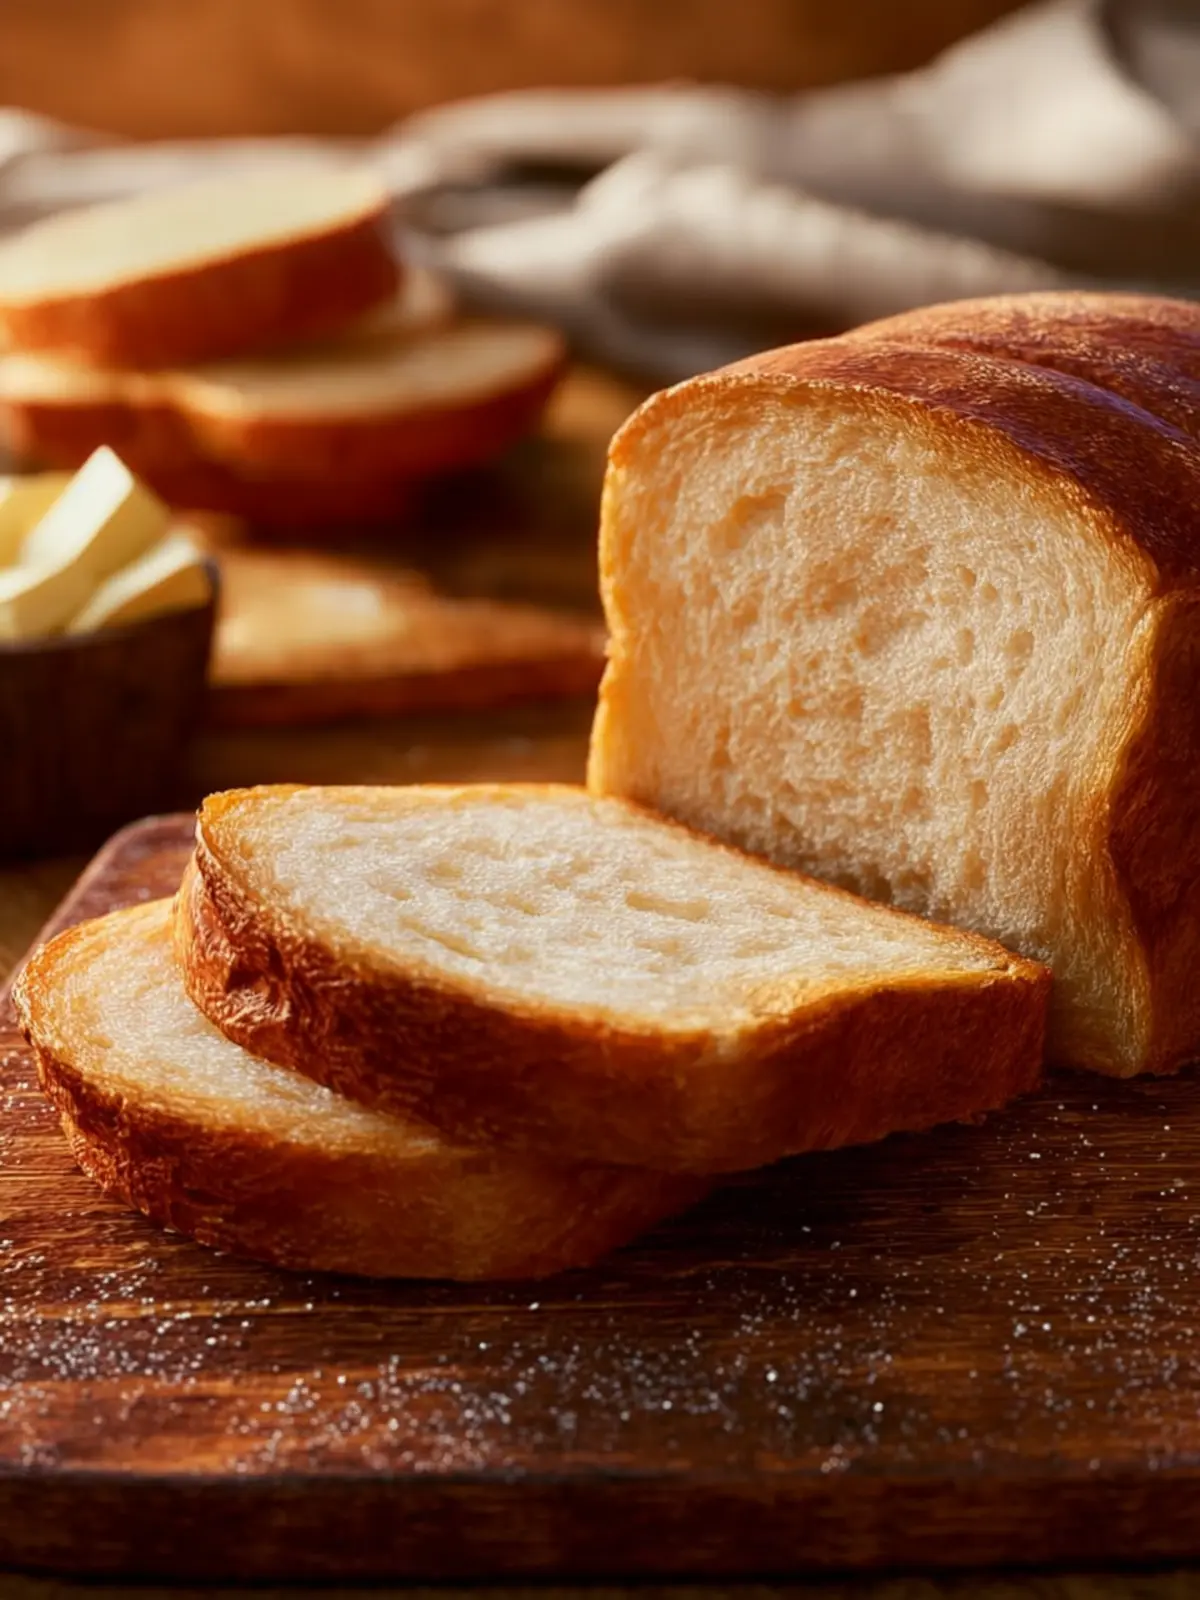
Why You’ll Love This Gluten Free Bread
Here’s the thing: finding a great gluten free bread recipe that doesn’t compromise on taste or texture can feel like hunting for a needle in a haystack. After countless experiments and taste-testing, I’ve finally created a loaf that’s soft, airy, and brings a satisfying chewiness to every bite. It’s not just about meeting dietary needs; it’s about enjoying good food that everyone can appreciate.
The beauty of this gluten free bread lies in its versatility. Whether you slather it with avocado for breakfast, use it as the foundation for your favorite sandwich, or simply enjoy it toasted with a pat of butter, its flavor is delicate yet memorable. Made with a combination of high-quality ingredients like almond flour and tapioca starch, this bread not only caters to gluten sensitivities but also boasts a nutty depth that elevates any meal.
You’ll love the delightful aroma wafting through your kitchen as it bakes—inviting friends and family to the table in eager anticipation. Plus, the sliceable structure ensures that each piece can hold its own, whether you’re crafting a classic PB&J or a gourmet grilled cheese. Experience a loaf that makes every gathering feel special and every meal exceptional.

Cooking Tips for Gluten Free Bread
Making gluten free bread can feel like a daunting task, especially if you’ve spent years perfecting your regular loaf. But fear not! Each bake is a new adventure, and I’m here to guide you through some essential tips that can elevate your gluten free bread game.
Choose the Right Flour
For a delightful loaf, opt for a high-quality gluten-free all-purpose flour blend. Look for options that contain xanthan gum or guar gum, as these provide crucial structure and mimic the elasticity that gluten usually offers. A mix often works best!
Don’t Skip the Soaking
Soaking your flour mix in liquids like milk or water for at least 30 minutes can improve texture significantly. It allows the ingredients to hydrate evenly, resulting in a more cohesive and flavorful bread.
Be Mindful of Measuring
Precision is key! Use a kitchen scale for the best results. Gluten-free ingredients can have varying densities, so measuring by weight ensures accuracy.
Let it Rise
Allow your gluten free bread dough to rise adequately. Instead of the traditional double rise, aim for a single rise until it roughly doubles in size. This is crucial since gluten-free dough doesn’t have the same forgiving nature as traditional dough.
By applying these simple yet effective tips, you’ll find that creating the perfect loaf of gluten free bread becomes not only achievable but also enjoyable. Happy baking!
Serving Suggestions for Gluten Free Bread
Getting creative with gluten free bread can transform your meals and snacks into delightful experiences. Whether you have some slices sitting on your countertop or a whole loaf waiting to be enjoyed, there are endless possibilities to explore.
Creative uses for leftover bread
-
Toast and Toppings: Revive stale slices by toasting them. Top with avocado, hummus, or spreads for a quick and satisfying snack.
-
Bread Crumbs: Pulse any leftover bread in a food processor to create gluten-free breadcrumbs, perfect for coating vegetables or chicken.
-
Bread Pudding: Transform old bread into a cinnamon-laced bread pudding. Mix with eggs, milk, and your favorite spices for a comforting dessert.
-
Croutons: Cut into cubes, toss with olive oil and seasonings, and bake until crispy for homemade gluten-free croutons to elevate salads and soups.
Exploring these ideas will not only reduce waste but will also elevate your culinary adventures to delicious new heights!
Time Breakdown for Gluten Free Bread
Creating the perfect gluten free bread is a rewarding journey that requires a bit of patience but yields delicious results. Understanding the time involved can help you plan your baking session effectively.
Preparation time
Getting started with your gluten free bread takes about 15 minutes. This includes gathering your ingredients and mixing them into a smooth, cohesive batter. Don’t rush this part; the right consistency is key to a successful loaf.
Rising time
Let your dough rest for approximately 60 minutes. This time is essential as it allows the dough to rise and develop flavor. Be sure to cover the bowl with a damp towel to maintain moisture during this process.
Baking time
Once risen, your gluten free bread needs about 45 minutes in the oven. It’s crucial to monitor the bread as it bakes to ensure it achieves that beautiful golden-brown crust.
Total time
In total, you’re looking at around 2 hours for your homemade gluten free bread. This includes preparation, rising, and baking time. Trust the process and enjoy the delightful aroma that fills your kitchen!
Nutritional Facts for Gluten Free Bread
Understanding the nutritional value of gluten free bread is essential for making informed dietary choices. Whether you’re gluten intolerant or just exploring alternatives, knowing these facts can be beneficial.
Calories
Typically, one slice of gluten free bread contains approximately 60-100 calories. The calorie count may vary based on the specific ingredients used, offering a lighter choice compared to traditional bread.
Carbohydrates
A standard slice usually has around 15-20 grams of carbohydrates. While this is similar to regular bread, gluten free varieties often feature healthier carbohydrate sources like almond flour or brown rice flour, providing more nutritional benefits.
Protein
Most gluten free bread options deliver about 2-5 grams of protein per slice. By choosing breads enriched with seeds or legumes, you can increase the protein content, making it a more substantial, energy-boosting choice for your meals.
FAQ about Gluten Free Bread
When embarking on your journey to create the perfect gluten free bread, many questions can pop into your mind. Let’s explore some common inquiries to ease your baking experience.
Can I replace ingredients in the gluten-free bread?
Absolutely! Many ingredients in a gluten-free bread recipe can be swapped out based on your preferences or dietary needs. For instance, you might use:
- Flours: If you’re allergic to one type, substitutes like almond flour or coconut flour can be used. Just keep in mind the moisture content each flour requires.
- Sweeteners: Feel free to experiment with honey, maple syrup, or agave if you want a healthier alternative to sugar.
Experimentation is encouraged, but remember that some substitutions can alter the taste and texture.
How do I store gluten-free bread for freshness?
Storing gluten free bread properly is essential to maintain its softness and flavor. Here are a few tips:
- Room Temperature: Keep it in an airtight container or plastic bag for up to three days.
- Refrigeration: If you live in a humid climate, refrigerate it to prevent mold.
- Maintain Texture: Place a slice of bread in the container to help retain moisture.
What is the best way to freeze gluten-free bread?
Freezing is a great option to extend the shelf life of your gluten free bread. Here’s how to do it right:
- Wrap: Slice the bread and wrap each slice in plastic wrap, then place them in a freezer-safe bag.
- Label and Date: This helps you keep track of freshness.
- Thawing: Just take out a slice and let it come to room temperature or toast directly from the freezer.
Is gluten-free bread safe for those with gluten intolerance?
Yes, gluten free bread is specifically designed for individuals with gluten intolerance or celiac disease. However, always check the labels to ensure there’s no cross-contamination—it’s safer to choose products labeled as certified gluten-free. Homemade versions, like the one you’re about to try, are an excellent way to ensure safety!
Conclusion on Gluten Free Bread
Embracing gluten free bread opens the door to delicious possibilities, whether due to dietary needs or a desire to explore new flavor profiles. Creating your own loaf not only allows for customization—think herbs, seeds, and spices—but also brings the satisfaction of home-baked goodness. Remember to store your gluten-free bread properly, as it can dry out quickly. When served fresh or toasted, this delightful bread can elevate any meal. As you venture into gluten-free baking, may your journey be filled with warmth, creativity, and the joy of sharing something truly wholesome with others.
Print
Gluten-Free Bread
- Total Time: 1 hour 15 minutes
- Yield: 1 loaf 1x
- Diet: Gluten-Free
Description
This gluten-free bread recipe is perfect for sandwiches, toasting, or enjoying with your favorite spreads.
Ingredients
Scale
- 2 1/2 cups all-purpose gluten-free flour
- 1 teaspoon xanthan gum (leave out if your flour already has it in it)
- 1 teaspoon gluten-free baking powder
- 1 packet rapid rise/instant yeast (2 1/4 teaspoons)
- 1/4 cup extra virgin olive oil
- 1/4 cup honey (or agave nectar or maple syrup)
- 1 teaspoon apple cider vinegar
- 1 1/2 cups warm water (100-110°F)
- 3 egg whites (from large eggs and room temperature)
- 1 teaspoon salt
Instructions
- Spray a 9-inch x 5-inch bread pan or 9-inch x 4-inch small Pullman loaf pan with gluten-free cooking spray. Move the top oven rack to the middle rack. Preheat your oven to 350°F.
- Add the gluten-free flour, baking powder, and instant yeast to a large bowl and stir to combine the ingredients.
- Add the olive oil, honey, apple cider vinegar, and warm water to the flour mixture and mix on low for 1 minute.
- Add the egg whites and salt to the dough and mix on medium for 1 minute until the dough looks like a thick cake batter.
- Pour the dough into the greased bread pan. Cover the pan with sprayed plastic wrap and a kitchen towel, allowing it to rise in a warm place for 30 minutes.
- Place in the oven to bake for 30 minutes at 350°F on the middle rack. The bread should be golden brown with an internal temperature between 205-210°F.
- Allow the loaf to cool in the pan for 10 minutes. Then remove it from the pan and let it cool completely on a cooling rack.
- Use a serrated knife to slice the bread. Store leftover bread in an airtight container at room temperature once cooled. Avoid pre-slicing before storage.
- The bread can be frozen once cooled. Wrap tightly in plastic wrap, then in foil or freezer paper, and place in a freezer bag for up to 3 months.
- Thaw the bread in the refrigerator overnight.
Notes
- Using a stand mixer with a paddle attachment is recommended for mixing the dough.
- If the bread cools completely in the pan, it can become soggy.
- Prep Time: 15 minutes
- Cook Time: 30 minutes
- Category: Bread
- Method: Baking
- Cuisine: American
Nutrition
- Serving Size: 1 slice
- Calories: 120
- Sugar: 8g
- Sodium: 150mg
- Fat: 4g
- Saturated Fat: 0.5g
- Unsaturated Fat: 3g
- Trans Fat: 0g
- Carbohydrates: 20g
- Fiber: 1g
- Protein: 3g
- Cholesterol: 0mg